
*ajax는 jQuery를 임포트한 페이지에서만 작동됩니다!
즉, http://google.com/ 과 같은 화면에서 [개발자도구]를 열면, jQuery가 임포트 되어있지 않기 때문에 아래와 같은 에러가 뜹니다.
Uncaught TypeError: $.ajax is not a function → ajax라는 게 없다는 뜻.
미세먼지 api : http://openapi.seoul.go.kr:8088/6d4d776b466c656533356a4b4b5872/json/RealtimeCityAir/1/99
ajax의 기본적인 골격은 아래와 같습니다.
$.ajax({
type: "GET", // GET 방식으로 요청한다.
url: "http://openapi.seoul.go.kr:8088/6d4d776b466c656533356a4b4b5872/json/RealtimeCityAir/1/99",
data: {}, // 요청하면서 함께 줄 데이터 (GET 요청시엔 비워두세요)
success: function(response){ // 서버에서 준 결과를 response라는 변수에 담음
console.log(response) // 서버에서 준 결과를 이용해서 나머지 코드를 작성
}
})
⊙ $ajax 코드 설명
- type: "GET" → GET 방식으로 요청한다.
- url: 요청할 url
- data: 요청하면서 함께 줄 데이터 (GET 요청시엔 비워두세요)
* GET 요청은, url뒤에 아래와 같이 붙여서 데이터를 가져갑니다.
http://naver.com?param=value¶m2=value2
네이버
네이버 메인에서 다양한 정보와 유용한 컨텐츠를 만나 보세요
www.naver.com
POST 요청은, data : {} 에 넣어서 데이터를 가져갑니다.
data: { param: 'value', param2: 'value2' }
- success : 성공하면, response 값에 서버의 결과 값을 담아서 함수를 실행한다.
success: function(response){ // 서버에서 준 결과를 response라는 변수에 담음
console.log(response)
}
ex. 모든 구의 미세먼지 값을 찍어보기
* jQuery를 임포트한 파이썬 파일을 크롬으로 열기 > 아무데나 우클릭 > 검사 > Console 들어가서 콘솔창에 아래의 코드를 입력해봅시다.
$.ajax({
type: "GET",
url: "http://openapi.seoul.go.kr:8088/6d4d776b466c656533356a4b4b5872/json/RealtimeCityAir/1/99",
data: {},
success: function (response) {
let mise_list = response["RealtimeCityAir"]["row"];
for (let i = 0; i < mise_list.length; i++) {
let mise = mise_list[i];
let gu_name = mise["MSRSTE_NM"];
let gu_mise = mise["IDEX_MVL"];
console.log(gu_name, gu_mise);
}
},
});
서울시 OpenAPI(실시간 미세먼지 상태)를 이용하기(+미세먼지 수치가 50이상인 지역은 빨갛게 표시)
<!doctype html>
<html lang="ko">

<head>
    <meta charset="UTF-8">
    <title>jQuery 연습하고 가기!</title>

    <!-- jQuery를 import 합니다 -->
    <script src="https://ajax.googleapis.com/ajax/libs/jquery/3.4.1/jquery.min.js"></script>

    <style type="text/css">
        div.question-box {
            margin: 10px 0 20px 0;
        }
        .bad{
            color: red;
        }
    </style>

    <script>
        function q1() {
            $('#names-q1').empty()
            $.ajax({
                type: "GET",
                url: "http://openapi.seoul.go.kr:8088/6d4d776b466c656533356a4b4b5872/json/RealtimeCityAir/1/99",
                data: {},
                success: function (response) {
                    let rows = (response)['RealtimeCityAir']['row']
                    for(let i = 0; i < rows.length; i++){
                        let gu_name = rows[i]['MSRSTE_NM']
                        let gu_mise = rows[i]['IDEX_MVL']

                        let temp_html = ``;
                        if(gu_mise > 50){
                            temp_html = `<li class="bad">${gu_name} : ${gu_mise}</li>`
                        }else{
                            temp_html = `<li>${gu_name} : ${gu_mise}</li>`
                        }
                        $('#names-q1').append(temp_html)
                    }
                }
            })
        }
    </script>

</head>

<body>
    <h1>jQuery+Ajax의 조합을 연습하자!</h1>

    <hr />

    <div class="question-box">
        <h2>1. 서울시 OpenAPI(실시간 미세먼지 상태)를 이용하기</h2>
        <p>모든 구의 미세먼지를 표기해주세요</p>
        <p>업데이트 버튼을 누를 때마다 지웠다 새로 씌여져야 합니다.</p>
        <button onclick="q1()">업데이트</button>
        <ul id="names-q1">
            <li>중구 : 82</li>
            <li>종로구 : 87</li>
            <li>용산구 : 84</li>
            <li>은평구 : 82</li>
        </ul>
    </div>
</body>

</html>
코드를 작성 후 크롬으로 열면 아래와 같이 보여진다.

ajax 연습
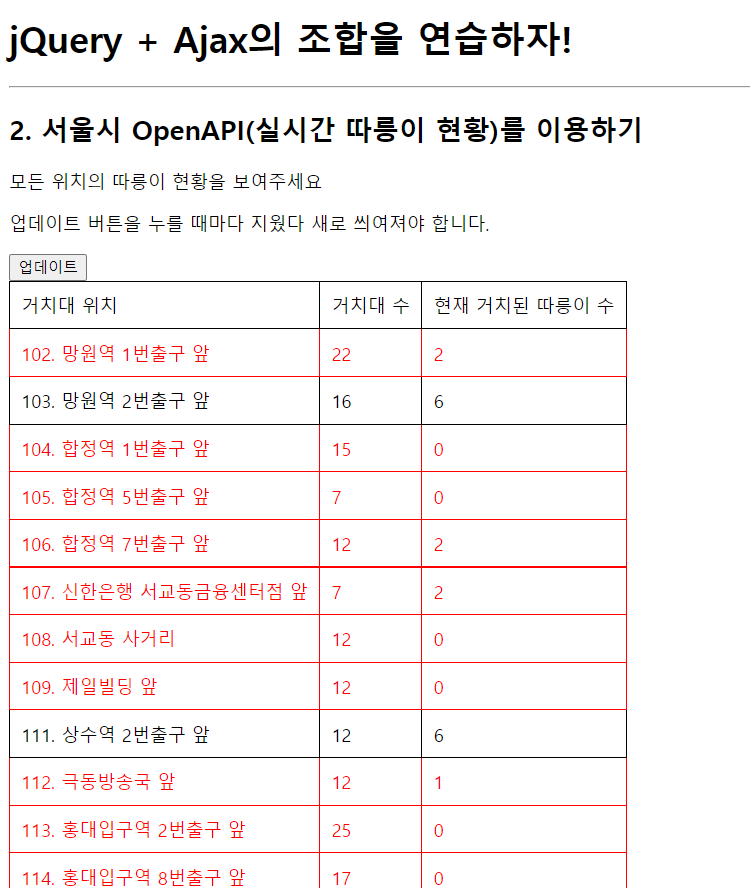
1) 서울시 따릉이 실시간 따릉이 현황 이용하기/거치된 따릉이 수가 5대 미만일 경우 빨갛게 표시하기
위의 코드
<!doctype html>
<html lang="ko">

<head>
    <meta charset="UTF-8">
    <title>JQuery 연습하고 가기!</title>
    <!-- JQuery를 import 합니다 -->
    <script src="https://ajax.googleapis.com/ajax/libs/jquery/3.4.1/jquery.min.js"></script>

    <style type="text/css">
        div.question-box {
            margin: 10px 0 20px 0;
        }

        table {
            border: 1px solid;
            border-collapse: collapse;
        }

        .bad{
            color: red;
        }

        td,
        th {
            padding: 10px;
            border: 1px solid;
        }
    </style>

    <script>
        function q1() {
            $('#names-q1').empty()
            $.ajax({
                type: "GET",
                url: "http://spartacodingclub.shop/sparta_api/seoulbike",
                data: {},
                success: function (response) {
                    let rows = (response)['getStationList']['row']
                    for(let i = 0; i < rows.length; i++){
                        let st_name = rows[i]['stationName']
                        let st_rack = rows[i]['rackTotCnt']
                        let st_park = rows[i]['parkingBikeTotCnt']

                        let temp_html = ``;
                        if(st_park < 5){
                            temp_html =
                                `<tr class="bad">
                                    <td>${st_name}</td>
                                    <td>${st_rack}</td>
                                    <td>${st_park}</td>
                                </tr>`
                        }else{
                            temp_html =
                                `<tr>
                                    <td>${st_name}</td>
                                    <td>${st_rack}</td>
                                    <td>${st_park}</td>
                                </tr>`
                        }
                        $('#names-q1').append(temp_html)
                    }
                }
            })
            // 여기에 코드를 입력하세요
        }
    </script>

</head>

<body>
    <h1>jQuery + Ajax의 조합을 연습하자!</h1>

    <hr />

    <div class="question-box">
        <h2>2. 서울시 OpenAPI(실시간 따릉이 현황)를 이용하기</h2>
        <p>모든 위치의 따릉이 현황을 보여주세요</p>
        <p>업데이트 버튼을 누를 때마다 지웠다 새로 씌여져야 합니다.</p>
        <button onclick="q1()">업데이트</button>
        <table>
            <thead>
                <tr>
                    <td>거치대 위치</td>
                    <td>거치대 수</td>
                    <td>현재 거치된 따릉이 수</td>
                </tr>
            </thead>
            <tbody id="names-q1">
                <tr>
                    <td>102. 망원역 1번출구 앞</td><!-- stationName -->
                    <td>22</td><!-- rackTotCnt -->
                    <td>0</td><!-- parkingBikeTotCnt -->
                </tr>
                <tr>
                    <td>103. 망원역 2번출구 앞</td>
                    <td>16</td>
                    <td>0</td>
                </tr>
                <tr>
                    <td>104. 합정역 1번출구 앞</td>
                    <td>16</td>
                    <td>0</td>
                </tr>
            </tbody>
        </table>
    </div>
</body>

</html>
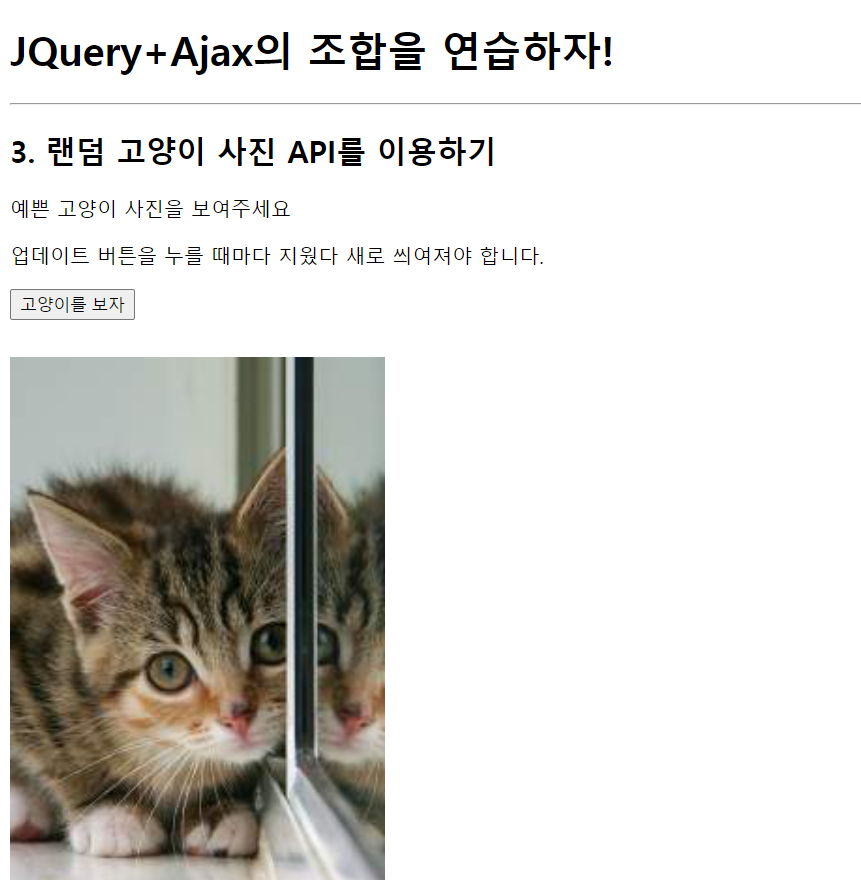
2) 랜덤 고양이 사진 API를 이용하여 버튼을 누를 때 마다 랜덤하기 고양이 사진 보여주기
위의 코드
<!doctype html>
<html lang="ko">
  <head>
    <meta charset="UTF-8">
    <title>JQuery 연습하고 가기!</title>
    <!-- JQuery를 import 합니다 -->
    <script src="https://ajax.googleapis.com/ajax/libs/jquery/3.4.1/jquery.min.js"></script>

    <style type="text/css">
      div.question-box {
        margin: 10px 0 20px 0;
      }
      div.question-box > div {
        margin-top: 30px;
      }

    </style>

    <script>
      $(document).ready(function(){
        q1()
      });
      function q1() {
          $.ajax({
              type: "GET",
              url: "https://api.thecatapi.com/v1/images/search",
              data: {},
              success: function (response) {
                  let cat = (response)[0]['url']
                  $('#img-cat').attr("src", cat)
              }
          })
      }
    </script>

  </head>
  <body>
    <h1>JQuery+Ajax의 조합을 연습하자!</h1>

    <hr/>

    <div class="question-box">
      <h2>3. 랜덤 고양이 사진 API를 이용하기</h2>
      <p>예쁜 고양이 사진을 보여주세요</p>
      <p>업데이트 버튼을 누를 때마다 지웠다 새로 씌여져야 합니다.</p>
      <button onclick="q1()">고양이를 보자</button>
      <div>
        <img id="img-cat" src="https://www.google.com/images/branding/googlelogo/1x/googlelogo_color_272x92dp.png"/>
      </div>
    </div>
  </body>
</html>
'TIL저장소' 카테고리의 다른 글
| [스파르타코딩클럽]웹개발 3주차 Robo3T 설치방법 (0) | 2021.06.22 |
|---|---|
| [스파르타코딩클럽]웹개발 3주차 MongoDB 설치하기 (0) | 2021.06.22 |
| [스파르타코딩클럽]웹개발 2주차 서버-클라이언트 통신 이해 (0) | 2021.06.22 |
| [스파르타코딩클럽]웹개발 2주차 jQuery 적용하기(퀴즈 만들기) (0) | 2021.06.22 |
| [스파르타코딩클럽]웹개발 2주차 jQuery 기초 (0) | 2021.06.21 |